
How to Crop to Selection in Affinity Photo 2
Cropping to a selection is a common task in image editing, however, it works a bit differently in Affinity Photo 2 than many are used to in Photoshop.
Whether you're trimming away distractions or isolating a specific subject, this technique allows you to focus on the essential elements of your image.
Get my Beginner-friendly Quick Start Guide to Affinity Photo - for Free
Method 1: Using the Crop Tool
Step 1: Create a Selection
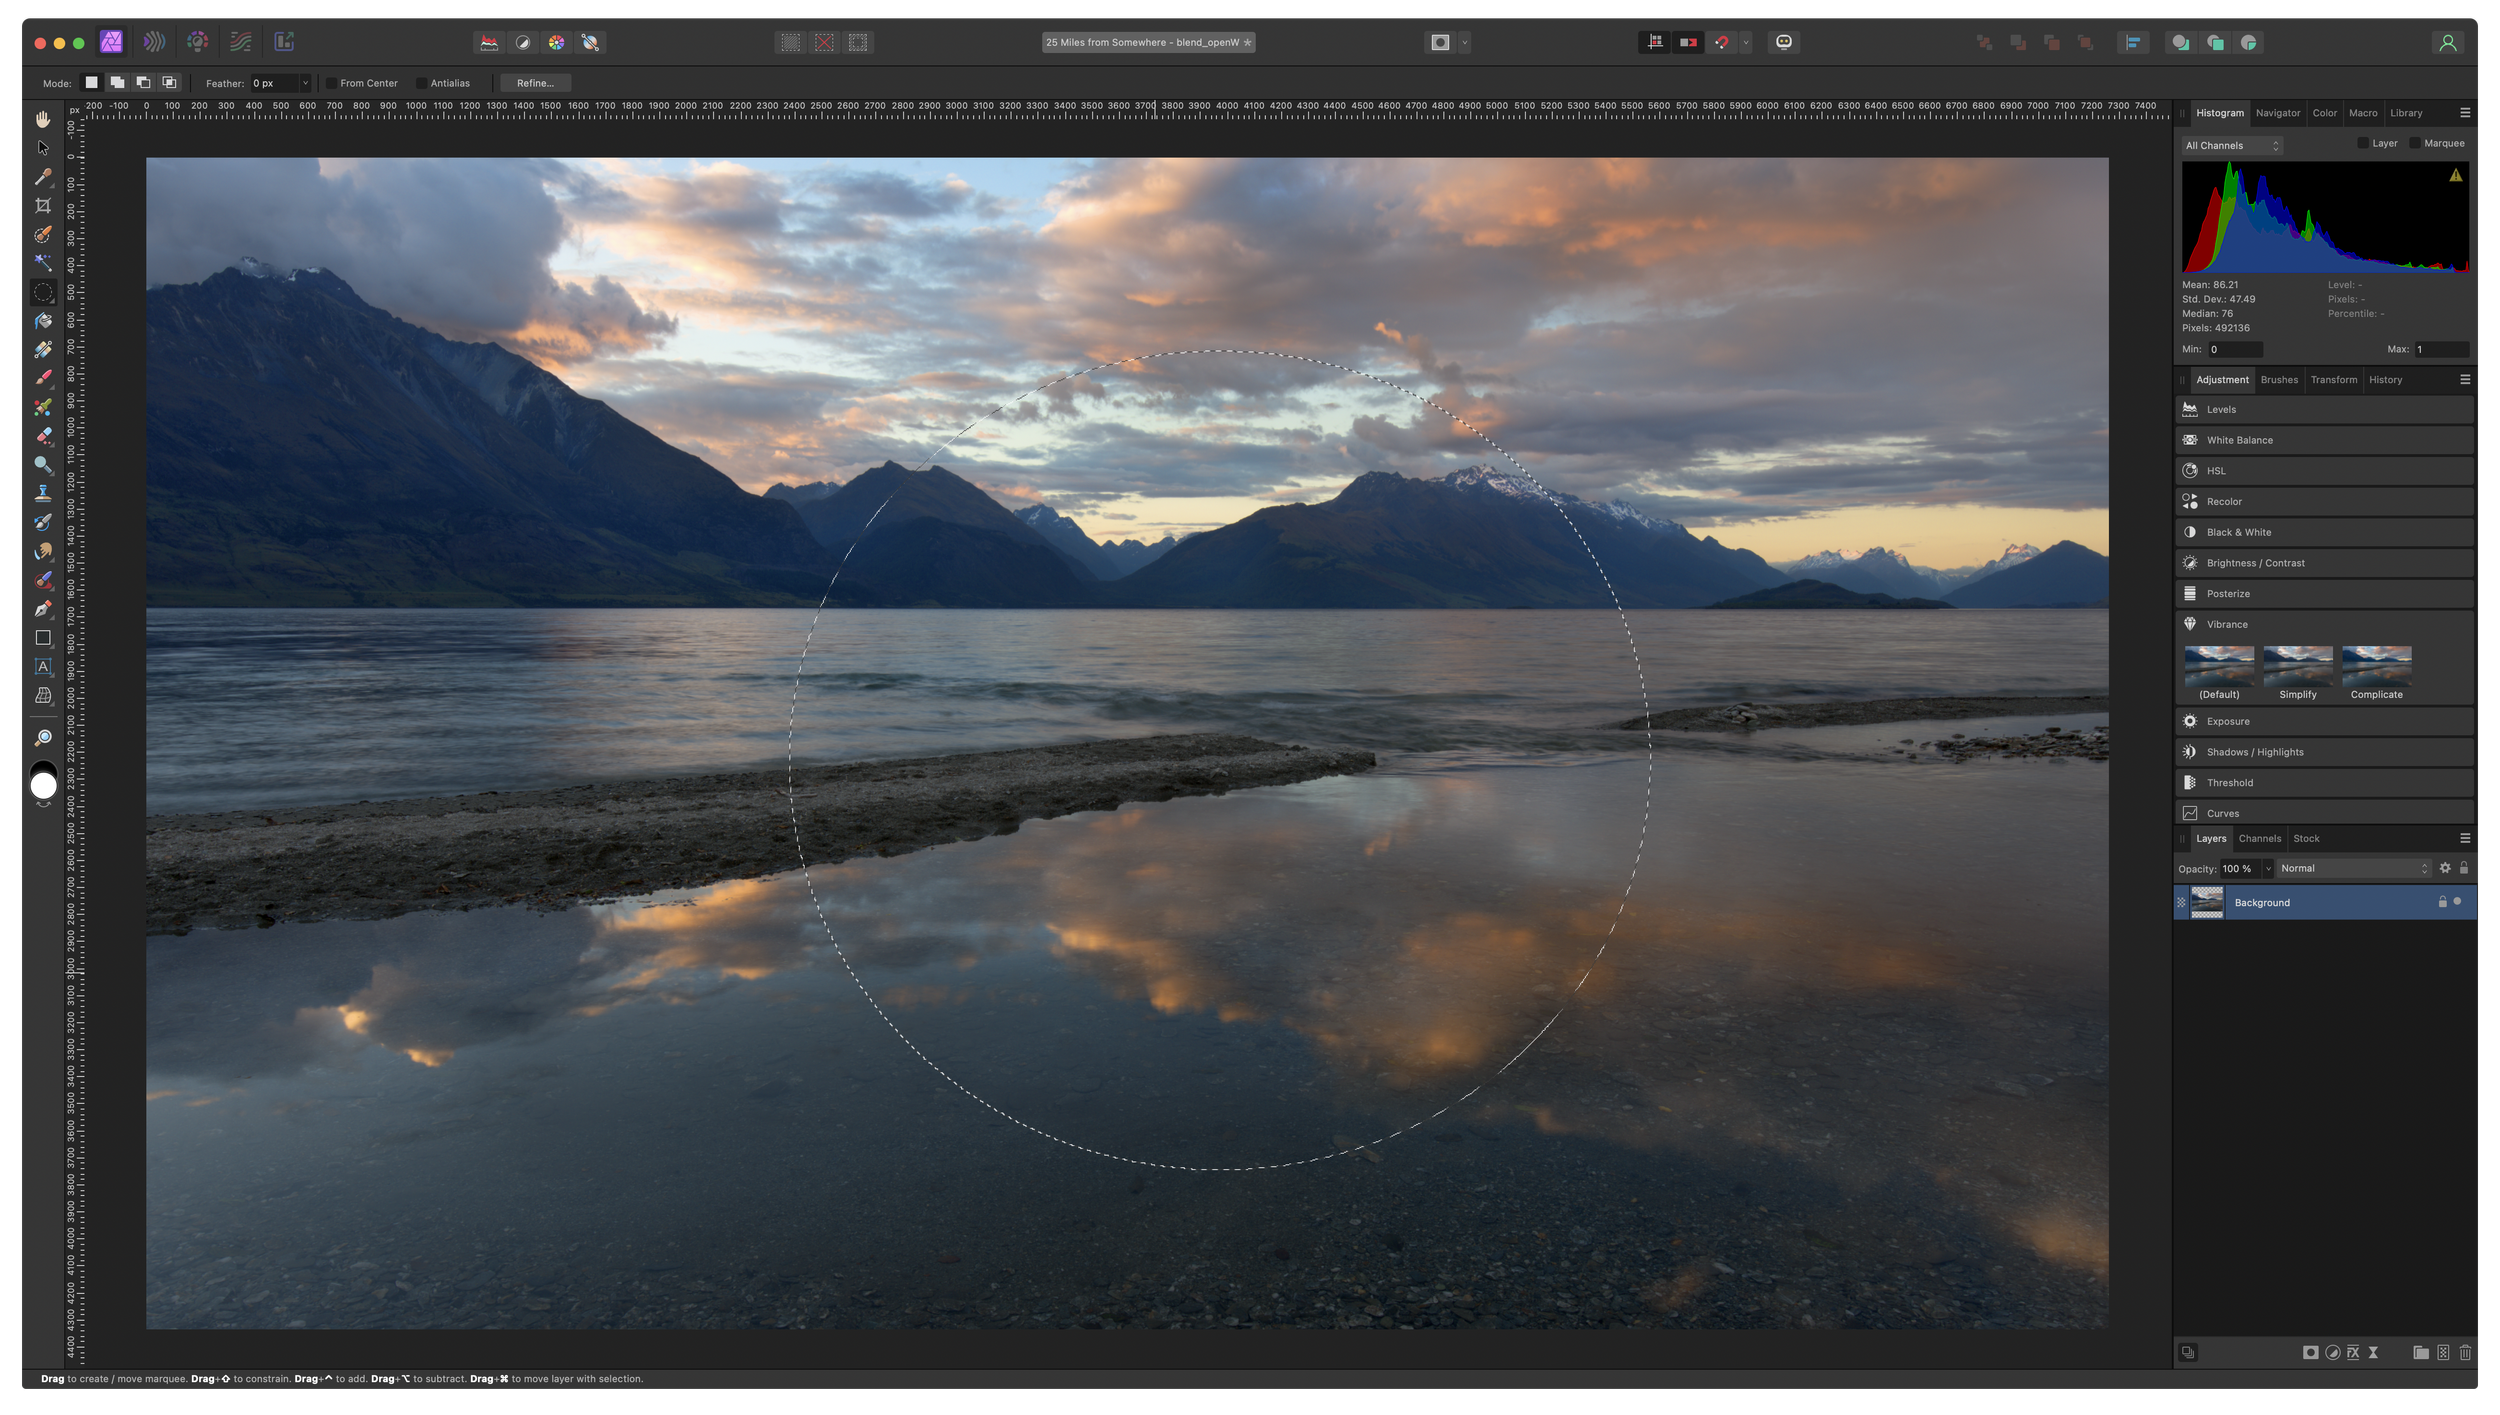
The first step is to create a selection around the area you want to keep. Affinity Photo offers a variety of selection tools to suit your needs, including the Lasso Tool, Marquee Tool, Magnetic Lasso Tool, and Magic Wand Tool.
Select the tool that best matches the shape of your subject and draw or click around the area to create the selection.

Here I have created a selection of the mountain range using the quick selection brush

Step 2: Enable Snap to Selection
To ensure the crop box aligns precisely with your selection, enable the "Snap to Selection Bounds" option in the Snapping Manager (View > Snapping Manager). This will cause the crop box to snap to the edges of the selection, ensuring a clean and precise crop.

This step is something that you only need to do once in Affinity Photo.

The last choice in the dialog is “Snap to pixel selection bounds”. Make sure it is enabled.

Step 3: Access the Crop Tool
Press the C key on your keyboard to activate the Crop Tool. You can also find it in the Tools panel (usually on the left side of the screen). Once the Crop Tool is active, you'll see a crop box appear around the selection.

Now the crop tool by default snaps to any active selection
Step 4: Adjust the Crop Box
You can drag the corners or sides of the crop box to adjust its size and position. If the Snap to Selection Bounds option is enabled, the crop box will automatically snap to the edges of the selection. You can also use the Transform Handles (the small squares in the corners and sides of the crop box) to rotate and skew the crop box. Just like you would normally use the crop tool.
Step 5: Execute the Crop
When you're satisfied with the crop, press the Enter key to execute the crop. This will remove the unwanted areas from the image, leaving only the selected portion visible.
Method 2: New Document (Image) from Clipboard
The second method you can use is to create a new image from the active selection, so you can work on this new image without affecting the original image. This is also useful if you want to add the selection to another image when doing some kind of composite work.
Step 1: Create the Selection and Copy it
First, create the selection you want. In this example we will first use a rectangular selection. Then click on CTRL+C (Win) or Command + C (Mac) to copy it into the clipboard.
Step 2: Create a new image from Clipboard
Go to File > New from Clipboard, (or use the shortcut Option + Shift + Cmd + N on a Mac to do this. This will create a new file from what is stored in the Clipboard.

With the rectangular selection, copy it, and then create a new image from clipboard.
Step 3: Adjust the new image that Affinity Photo create from the Clipboard

Note: Non-rectangular selections results in a blank canvas showing.
If you copy something that is not rectangular, such as a circle, using this method, you will get a blank canvas.
The selection in the original image

The selection in the new image showing a transparent background
Method 3: Export Selection Only
If your goal is to go straight to exporting your image right after cropping, you can also use the approach of exporting the selection instead.
Exporting a selection only in Affinity Photo 2 allows you to save a specific portion of your image without the surrounding background or other layers. This technique is useful for creating isolated elements, trimming away unwanted details, and exporting high-quality graphics for various purposes.
Step 1: Create a Selection
First, use your preferred selection tool to create a precise outline around the desired area you want to export.
Step 2: Duplicate the Layer
With the selection active press Command + J (Mac) or CTRL + J (Win) to create a copy of the active layer based, but also based on the active selection.

Step 3: Navigate to the Export Menu
Go to File > Export to bring up the dialog.
Step 4: Set "Area: Selection Only"
Under the "Area" drop-down menu, and choose "Selection Only." This will instruct Affinity Photo to export only the selected area and exclude any surrounding layers or the background.
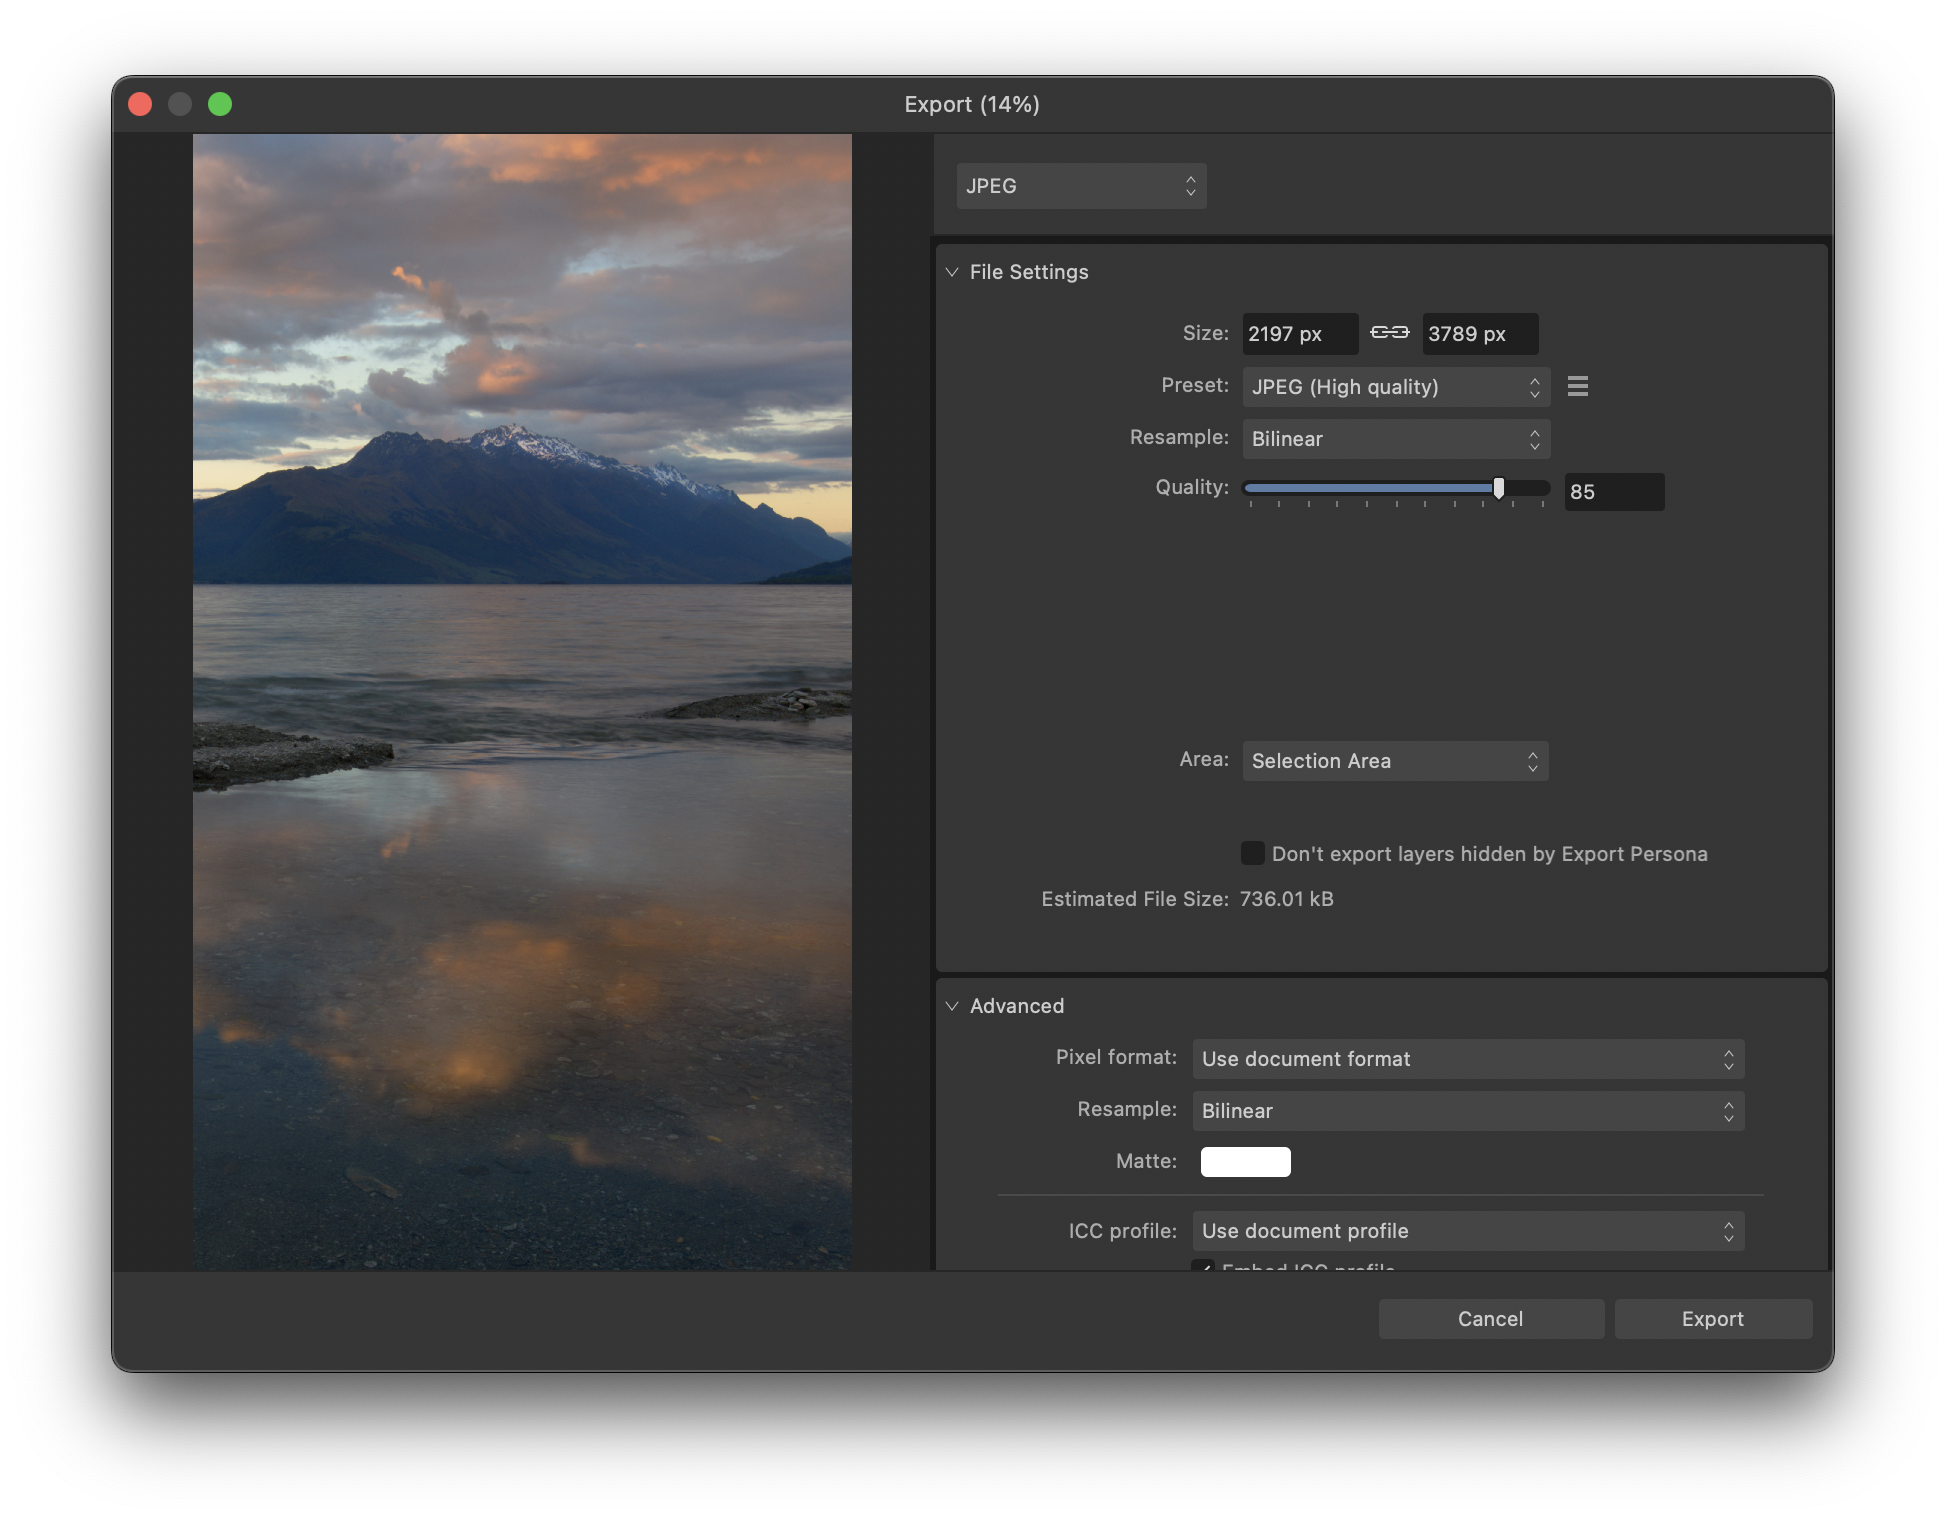
Notice in the middle of the dialog, where it says Area: Change the drop down to “Selection Area”.

The exported selection
Step 5: Adjust Export Settings
Customize the export settings according to your requirements. Choose the desired image format, resolution, and color profile. You can also adjust the compression level to balance image quality and file size.
Step 6: Click "Export"
Once you're satisfied with the settings, click the "Export" button to save the selected portion of your image. The exported file will contain only the selected area, preserving its integrity and quality.
Concluding words
There are many reasons why you would want to crop to a selection in Affinity Photo. By following these simple steps, you can quickly and easily remove unwanted background elements, isolate subjects, and enhance the focus of your images, or even use selections in new images using Affinity Photo 2.