
How to Flag a Photo in Lightroom CC
It may sound boring, but organizing and keeping track of your photos is key to becoming a time-efficient, productive and successful photographer. Learning how to flag a photo in Lightroom can help you to keep organized and speed up your workflow.
What is a Flag in Lightroom?
A flag in lightroom is a simple system for categorizing your photos into one of two categories: Picked or Rejected.
Find a photo you want to keep - flag it as ‘picked’ and you’ll have it bookmarked for later.
Find a photo you don’t want - flag it as ‘rejected’ to easily remind yourself to delete the photo from lightroom.
Taking the time to go through all of your photos after a shoot and sort them into these two categories can save you a lot of time and effort when it comes to editing those photos. The flag rating method comes before using color labels, as you only want to add color labels to the photos you actually want to keep.
Get my eBook: 25 Techniques all Photographers Should Master - for Free
How To Flag A Photo In Lightroom Classic
Step One: Open Loupe View
It is best to sort through your photos and flag them whilst in the Library Module. Whilst in the library module, switch to Loupe View by pressing the loupe button in the bottom toolbar or using the keyboard shortcut Shift+E. You can now flick through each of your photos by pressing either the left or right arrows on your keyboard.
Step Two: Categorize Your Photos
For each photo, you can press P to automatically flag a photo as ‘picked’. Your image will have a small white flag appear to the top left whilst in the filmstrip. A white flag will also appear in your toolbar. Likewise, if you come across a photo you don’t want, press X to mark it as ‘rejected’. Your image will have a small black flag with an x inside appear to the top left, or in the toolbar.
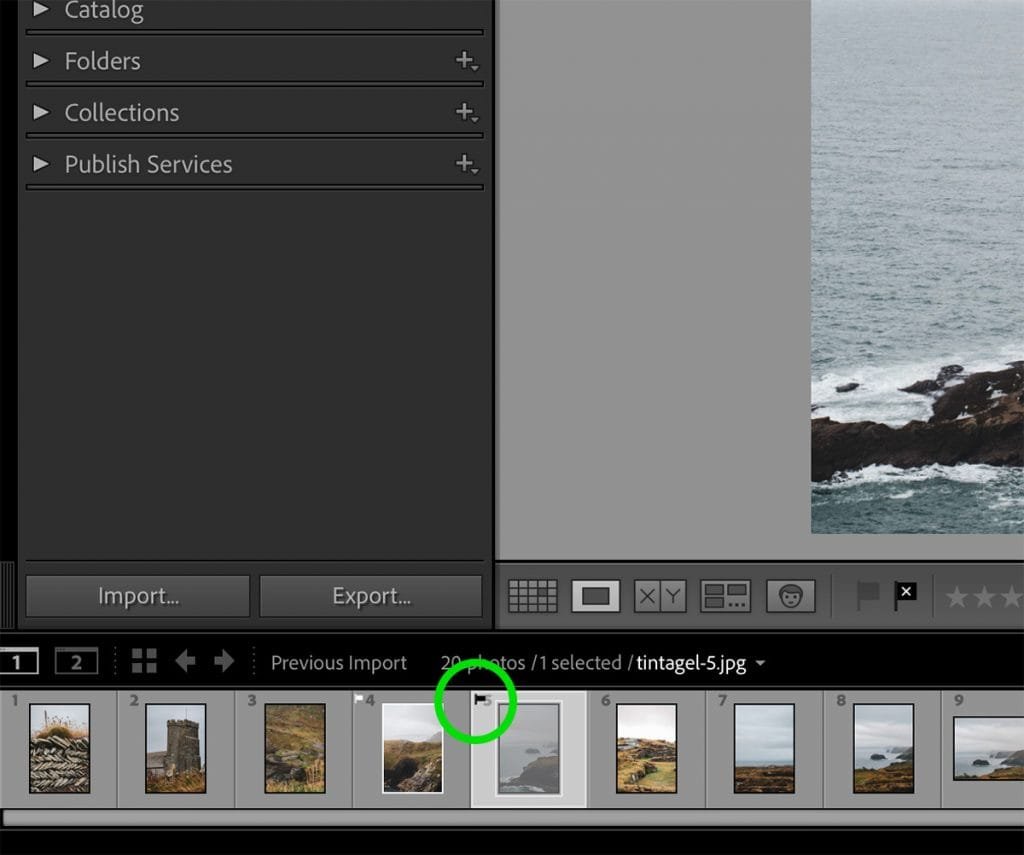
'Rejected' flag on photo in Lightroom
If you prefer that Lightroom move to the next photo, once you have flagged or rejected it, go to Photo > Auto Advance (make sure it is checked).
How to View Only Flagged Photos in Lightroom
Lightroom allows you to filter photos by how they have been flagged. To easiest way to do this is to go into the library module, select grid view (Shift + G), and go to the attribute settings. This can be found at the top of your library module and once selected, will show you a variety of options for filtering your photos.
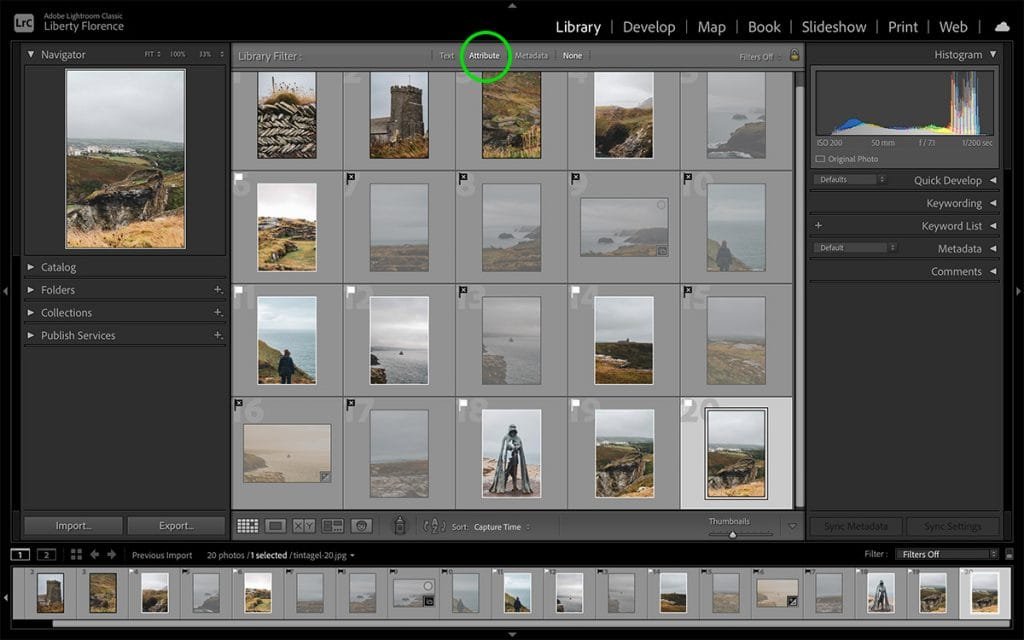
Attribute settings in LR
To see only your ‘picked’ photos, select the white flag icon. For your ‘rejected’ photos, select the black flag icon. Or, to only see unflagged photos, select the gray flag icon.

Sort by flag
How To Flag Multiple Photos in Lightroom
Step One: Select Your Photos
To select multiple photos at once, hold down CMD/CTRL on your keyboard and select each of the photos you want to include individually. Alternatively, if the photos you want are in sequence, hold down Shift and select the first and last photo in the sequence.
Step Two: Categorize Your Photos
With multiple photos selected, you can still use the keyboard shortcuts given earlier. Alternatively, right-click your selection and go to Set Flag > Flagged or Set Flag > Rejected.

Set flag

How To Unflag A Photo
If you’ve made a mistake and realized that you’ve flagged the wrong photo, or haven’t decided whether it should be picked or rejected, you can quickly unflag any photo by pressing U. If you want to unflag multiple photos, you will need to right-click your selection and go to Set Flag > Unflagged
How To Delete Flagged Photos in Lightroom
As you go through your photos, taking the time to flag the ones you don’t want as rejected can save you a lot of time when you want to quickly cull your library.
You can do this by going to the attribute setting whilst in grid view and selecting the black flag icon. This will filter your photos to only show you the ones flagged as rejected.
From here you can quickly delete these photos by going to the top menu bar and selecting Photo > Delete Rejected Photos (CTRL + Backspace).
How to Select All Flagged Photos in Lightroom
You can easily make Lightroom select all flagged photos, by first filtering for flagged photos, and then pressing CMD/CTRL+ A. Hereafter, you can do whatever you prefer with multiple images selected.
How To Export Flagged Photos in Lightroom
Flagged photos can also come in handy when it comes to exporting photos. If you want Lightroom to export only flagged photos, filter your photos by selecting the white flag in the attribute settings and select all of the photos that appear, by using the methods described above.
With the photos selected simply go to the top menu bar and select File > Export to export all of your picked photos.

Export flagged images
Lightroom Flag Shortcuts Summarized
Here is a summary of the flag shortcuts in Lightroom:
Set flag shortcut: P
Reject image: X
Unflag: U
Delete rejected photos in Lightroom: CTRL + Backspace
Conclusion
Getting to grips with categorizing your Lightroom photos using the flag system can help you to speed up your workflow and keep you organized. Hopefully, this has helped you better understand how to flag pictures in Lightroom, and how to reject images to keep your Lightroom Catalog tidy.