
How to Fade an Image in Photoshop
Sometimes you find that photos you take can work well as part of a graphic design by fading into a transparent background. Or add to a composite by blending with other images. In this tutorial, you will learn to use Adobe Photoshop for how to fade out an image by using a gradient mask.
Get my eBook: 25 Techniques all Photographers Should Master - for Free

Sample Image
Our sample image, that we will fade into a transparent background.
Step-by-Step: How to Fade Part of an Image in Photoshop
Follow these simple steps to fade an image gradually into a transparent background, or into the background layer.
Step 1: Open the Image in Photoshop
Open the image you want to fade in Photoshop.
Step 2: Unlock the Background Layer

Unlock background layer in PS
Step 3: Expand the Canvas
Go to Image > Canvas Size and extend the canvas, so you have an area, where the image can fade into.
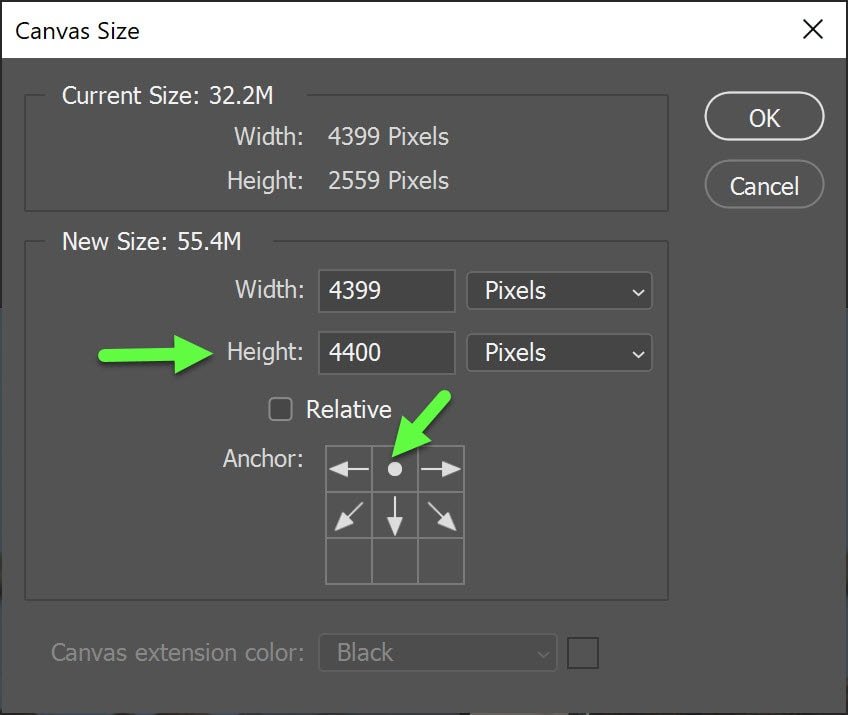
change canvas size dialog PS
In this case, we will extend the height to 4400 pixels. When changing canvas size, it is important to set the anchor point. The arrows indicate in which direction the canvas size will extend.
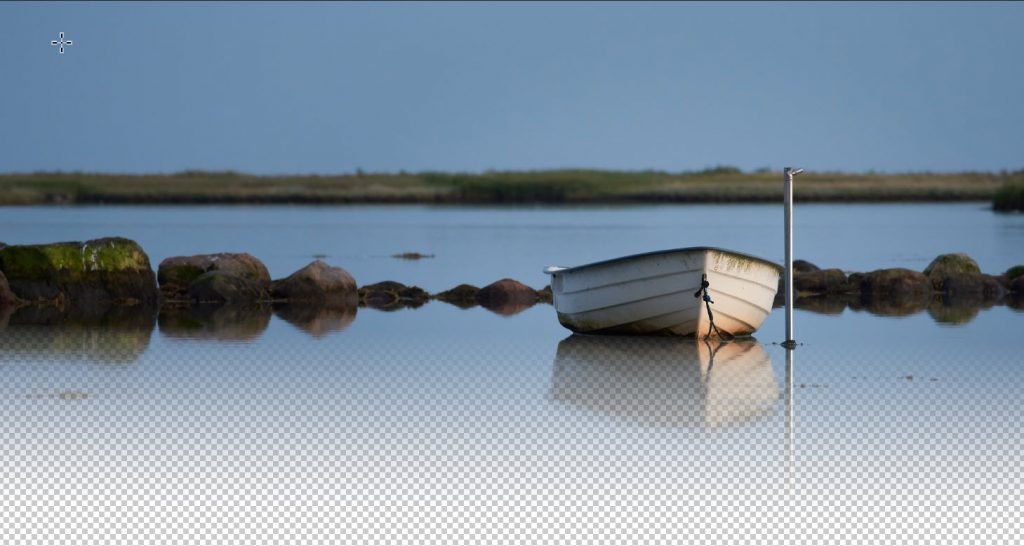
extended canvas size
As you can see we now have a larger canvas, but with a very abrupt ending of the image. This we will change into a graduated fading.
Step 4: Add a Layer Mask
Click on the layer mask icon at the bottom of the Layers panel.
Add layer mask icon
Clicking on the layer mask icon adds a white layer mask to the active layer. A white layer mask means that everything on the layer is visible. A black layer means that the image is completely hidden. Make sure that the layer mask is selected (and not the pixel layer itself.)

layer mask active in PS
Step 5: Select the Gradient Tool
Select the Gradient Tool from the toolbar.

gradient tool

Step 6: Make Sure you Use a Black-White Gradient Mask
We will use a black-white gradient on the layer mask to create the fading effect of the image into the background.
In the options bar, you should see a gradient fading from white to black (left-to-right).

options bar for the gradient tool
If not, click on the downward pointing arrow to the right of the gradient, and select the correct gradient from the basics folder.

basic gradients
Step 7: Draw the Gradient
Go back to the image. Make sure that the layer mask is selected in the layers panel.
Draw a short line from near the edge that you want to fade. In our example, it is the bottom edge we want to fade. So we will draw the line in a downward direction.
Starting a little towards the middle of the image, and click and drag a line towards the bottom edge.

click and drag to draw the transition
The longer the line the more smooth the gradient (and transition) will be. A shorter line means a more abrupt gradient.
long gradient result
A longer gradient line results in a more gradual fading

shorter gradient
A shorter gradient gives a more sudden transition. We will use this in our example
Make sure you don't draw the gradient too low, so the edge will show in the transition.

unnatural fade in Photoshop
If you only want your image to fade into transparency, you have achieved your result, as long as you cannot see a visible edge in the transition.
Step 8: Save as PNG.
Remember to save your image using the .PNG file format to keep the transparency, when you use the image online or in Adobe InDesign or Illustrator.
Related Photoshop Posts:
Optional: Applying a Solid Color Fill to Fade Into
Step 9: Add a New Layer
Add a new layer using the create new layer icon in the layers panel.

create new layer
Drag the new layer below the image layer with the fade.

new layer as the bottom
Step 10: Fill the Bottom Layer with the Background Color
Click on the Create New Fill or Adjustment Button at the bottom of the Layers panel, and select Solid Color.

create new color fill or adjustment
Step 11: Use the Color Picker to Chose a Color to Fade Into
The cursor now changes into a color picker, meaning that the next color you click is chosen as the fill color. With the mouse, select a color on the image layer just before the fading begins. This will ensure a suitable color for the image to transcend into. Click OK when you are satisfied with the color.

use the color picker to select a background color
The newly created layer, which is below the image layer, should now have a Color Fill applied to it. If you want to change the color double-clicking on the color fill thumbnail in the layers panel will take you back to the Color Picker Dialog.

color fill layer
The Final Result with the Extended Canvas
There are other ways to get to the same result, but to make a natural-looking fade into a transparent background or a solid color applying a gradient to a layer mask, is one of the easiest and best methods.

Extended canvas with a smooth fading into a background color.