
How to Change Canvas Size in Photoshop CC
The canvas in Adobe Photoshop is your work area, and when working with photos, the canvas size and the size of the image are usually the same. However, suppose you want to add a fake reflection to your image and need more space below the actual image.
In this case, you need to know how to change the size of the canvas in Photoshop. It could also be that you have a wildlife image, where you want a bit more space around your subject and want to use context-aware fill to fill in the blank space you get when increasing the canvas size.
Get my eBook: 25 Techniques all Photographers Should Master - for Free
Method 1: Using the Crop Tool to Adjust the Canvas Size:
The easiest method is to use the Crop tool to increase or decrease the canvas size.
Step 1: Zoom Out
First, we need to see the entire canvas and the area we want to extend the canvas to.
You can Zoom out by pressing Cmd/Ctrl + - (minus). Alternatively, you can use the Zoom tool and hold down Option/Alt while clicking on the canvas.
Step 2: Use the Crop Tool
Switch to the Crop Tool (C), and drag the bottom crop handle outwards/downwards to increase the canvas size. You can also use the crop handles on the side of the image to extend the canvas horizontally.

change canvas size using crop
If you instead want to reduce the size, draw the crop handle towards the center of the image. Note that this will, of course, also crop the image size as well.
Be mindful of clearing any ratio settings in the options bar of the crop tool.
Method 2: Using the Image Menu and Canvas Size Dialog
Step 1: Zoom Out
Just like described in the method above, resizing the canvas is easier if you zoom out using the zoom tool or Cmd/Ctrl and - (minus key).
Step 2: Open the Canvas Size Dialog
Go to Image > Canvas Size...

canvas size menu
This will bring up the Canvas Size dialog box.
Step 3: Change the Height and Width
The first thing to change here is the size options. Change the width and height to the total number of pixels your canvas should have. You can also choose only to change one of them to expand the canvas in one direction only.

change width and height
If you check "Relative," then the values in the width and height change to 0 (zero). The values you now enter are the number of pixels you add to the canvas size.

use relative values when changing canvas size in Photoshop
In our case, we want to add pixels to the height dimension to expand the canvas vertically.

Step 4: Tell Photoshop How to Expand the Canvas
Next, you need to tell Photoshop in which direction to expand the canvas. You do this by setting an anchor point. The arrows then indicate the direction for extending the canvas.

choose anchor
(Step 5: Set the Canvas Extension Color)
If you are working on a locked background layer, then you have to choose a canvas extension color. The default is black, but you can change it using the Canvas extension color menu or use the color picker to choose any color you like.
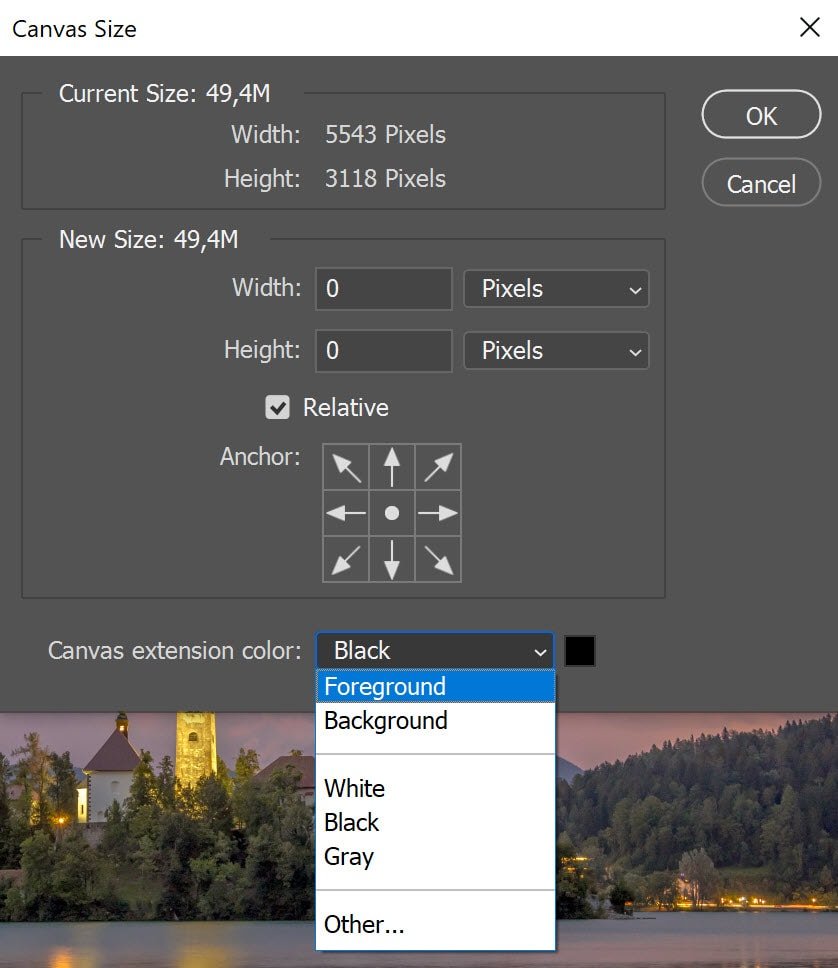
extension color
If you instead prefer a transparent background, you should unlock the background layer before extending the canvas.
Click OK to extend the canvas.

extended canvas

flipped reflection
Concluding words
Now that you have successfully extended the canvas in Photoshop, you will likely want to fill in the parts of the image that is transparent. This usually involves using the content-aware fill tool or duplicating the layer, flipping it, and using it as a reflection. However, we will cover this in another tutorial.