
How to Use Masks in Affinity Photo
Using layer masks in Affinity Photo is a powerful way to combine parts of several images into a single image or to limit the effect of adjustment layers and filters to only affect a part of your image. Layer masks are nondestructive. This means that you can modify them at any stage of your post-processing workflow. In this Affinity Photo masking tutorial, you'll learn how to use them to enhance your images.
Get my Beginner-friendly Quick Start Guide to Affinity Photo - for Free
What Are Layer Masks?
Layer masks allow you to control which part of an image layer should be visible and what should be hidden. You can add a layer mask to a layer or a group of layers. When added, the layer mask will either hide or reveal the layer below depending on the mask's tonal value on a grayscale.
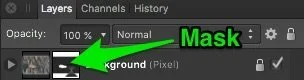
When you add a layer mask to a layer, a small thumbnail will appear to the right of the image layer's thumbnail giving you a small preview of what the mask looks like.
A mask with pure white shows/reveals the layer. This also means that it hides anything on a lower layer.
A mask with pure black hides the layer the mask is added to. This means that anything on a lower layer will become visible in the image.
If you give the layer mask a grey tone color it will partly show the layer and the layer below, just like the layers opacity slider would, except that you can control the layers opacity by using gray tone values. Now, this isn’t very useful yet. However, when you begin to create fine selections or draw with a brush tool on the layer masks you can control exactly which part of a layer should be visible and how it should blend with the below layer.
To summarize:
White color in the layer mask shows the layer
Black color hides the layer
Gray color partly shows/hides the layer corresponding to its graytone value. The closer the graytone the masking color is to white, the more it shows the layer (and therefore the more it hides the below layer).

How To Add A Layer Mask In Affinity Photo?
Let us begin with a simple example in Affinity Photo. First, create a blank document/image file.
Next, create two layers. Make the top one green and the one below it red.
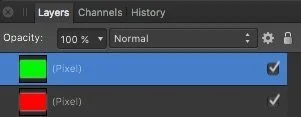
Affinity Photo - layers
As you can see the red layer to completely covered by the green layer on top.
Now, let us add a mask to the green layer.
You can go about adding a layer mask in two different ways. You can either add a layer mask that shows or hides the entire layer or add a mask that takes the active selection into account and hides or shows the layer based on the selection.
Adding A Layer Mask That Hides Or Shows The Entire Layer
Make sure that you have no active selections in your image. You can do this by pressing CTRL+D (Win) / CMD+D (Mac) or by choosing Select > Deselect from the menu.
Next, select the layer you want to apply the mask to. In this case, select the green layer.
To create a mask that shows the entire layer, click on the Add Layer Mask button (insert image). You will find it at the bottom of the Layers panel.

If you instead want to hide the entire layer with the mask, you should hold down the Alt key (Win) / Option key (Mac) while clicking on the Add Layer Mask button. This will make the green layer invisible or hidden. The green layer is still there in the layers panel, but the masking layer thumbnail will be black indicating that the layer is hidden. Anyway, let us continue the example by starting with a white masking layer.
Using A Brush To Modify The Mask Layer
The next step is to click on the mask thumbnail and then use the brush tool on the image to modify the mask so it hides the parts of the layer you don’t want to be visible and shows the part you want to be visible. Again use a white brush to show the layer which has the mask and black to hide it. Since we are working on a completely white mask (making the layer visible), you can choose a black brush to reveal some of the red layer below. Remember to select the mask thumbnail to paint on the mask and not the image layer itself. When you use the black brush and paint on the mask, everywhere you use the brush will be hidden and reveal the red layer below.
For a more smooth transition, you can turn the opacity up and down or adjust the hardness of the brush.

Create a Gradient Mask
A gradient mask in Affinity Photo is simply a layer mask, where you apply the gradient tool. By selecting the gradient tool, you can apply either a linear or radial gradient to your mask. By selecting one end of the gradient to be white, and the other black, and applying the gradient, you can control, which areas the mask shows, and which it hides. It is a simple but powerful way to combine, for instance, an exposure adjustment layer, with the gradient tool, so the exposure adjustment layer is only affected. i.e. the upper part of the image, and gradually fades as you reach the lower part of the image.

Add a Layer Mask Based on a Selection
If you already know which part of the top layer you want to show and which to hide, you can take a shortcut and create a precise selection of the area and base the Affinity Photo layer mask on the selection.
First, create the selection, and then based on whether you want to hide the selected area or show this part of the layer, do the following:
If you want to show the selected area on the active layer, click on the Add Mask Layer button at the bottom of the Layers Panel. This will add a mask layer, where the selected area is white and thus reveals the area, and the rest will be black and therefore hidden, making the layer below visible in this part of the image.
If you want to hide the area you have made a selection of, you should press and hold the Alt key (Win) / Option key (Mac) while clicking on the Add Mask Layer button in the Layers panel. This will create a layer mask, where the selected area becomes black in the mask and thus makes this part of the layer transparent so you can see the layer below. The mask for the unselected part of the image becomes white and remains visible.

Add mask layer button in Affinity Photo
Note, that you can also invert a layer mask. This is particularly useful when it is easier for you to select or brush the opposite of what you want to mask. To invert a layer mask in Affinity Photo, simply select the layer mask, and then go to Layer > Invert. Alternatively, you can also use the shortcut CMD+i (Mac) / CTRL + i (Win).
How To Enable Or Disable A Layer Mask?
After adding a layer mask, you might want to check how it has altered your image. To do this, the easiest way is to disable/enable the mask by shift-clicking on the layer mask thumbnail. This toggles the mask on and off. Alternatively, you could uncheck the checkbox on the right side of the masking layer. When the mask is disabled a red diagonal line is shown on top of the mask thumbnail and you will see the image without the masking effects.

Disable the masking layer
How To Delete A Layer Mask?
If you regret adding a layer mask you can always delete it by selecting and dragging it to the trashcan button on the Layers panel. Remember to drag the mask thumbnail to the trashcan and not the image layer.
How to Move or Copy a Layer Mask to Another Layer?
If you want to move a layer mask from one layer to another, you can simply click-and-drag the mask from one layer to another layer.
If you want to copy a layer mask to another layer, you need to press-hold Alt (Mac: Option), and then click-and-drag the original mask to any other layer and release the mouse and Alt key.
Displaying The Layer Mask Overlay
If you want to get a more detailed look at what your mask actually does, all you need to do is to hold down the Alt key (Win) / Option key (Mac) and click on the layer mask thumbnail. This will display a black and white representation of the mask on top of your image. This allows you to fine-tune the mask, even more, using the brush tool. To make the mask overlay disappear again, just click anywhere else in the layers panel to return to the normal view.
Working with masks in Affinity Photo is very useful for blending several bracketed shots together into a single image. This can be a complex and tedious editing process, which I will save for another article. In this tutorial, however, we will continue with looking at how you can use layer masks to limit the effect of adjustment layers and live filters to specific parts of an image.
Adjustment Layers and Masks in Affinity Photo
Adjustment layers have an inbuilt mask that is set to be completely white per default. This means that when you add an adjustment layer it will be applied to the whole image. You don't have to add a new masking layer to your adjustment layers. You can modify this mask just as you would with a layer mask as explained above by using a brush or any of the selection tools.
Create a selection in Affinity Photo to affect the masking layer
Refining A Mask To Make It More Precise?
Now that you know how to create a mask and how it basically works, let us dig into how you can use a mask together with selections to change the background of an image.
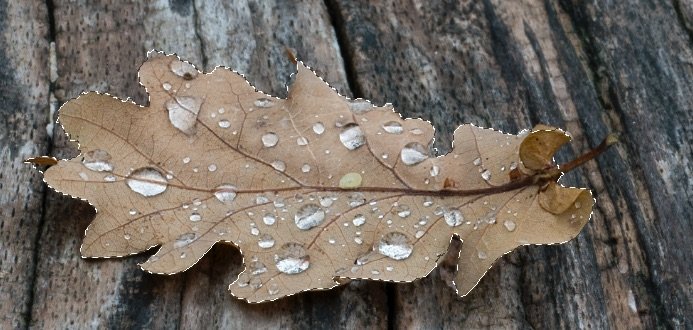
As a case or sample image, we will use the above image of a leaf that I want to add some clarity to, without affecting the background. We can do this by using a Clarity Live filter with a mask. Remember this is just for the sake of improving this sample image. The principle behind refining a mask is the same for all adjustment layers, Live filters, and creating normal layer masks to blend two images together.
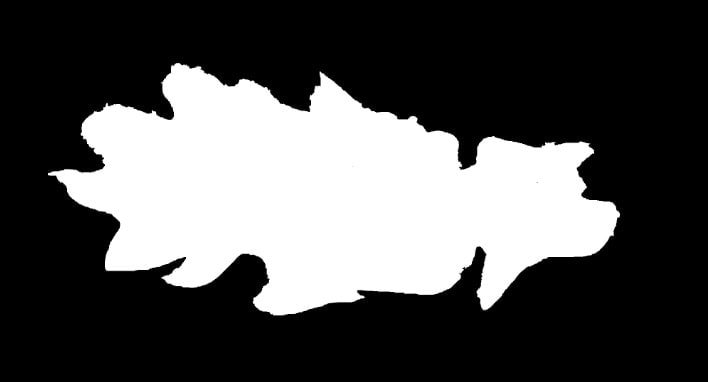
First, create a selection of the leaf by using the magic wand selection tool or quick mask tool in Affinity Photo. Next, go to the Layers menu and choose Live Filters > Clarity filter. Because you already have an active selection when creating the clarity live filter Affinity Photo will automatically add a mask based on this selection. If you didn't have an active selection, the mask would be all white. This would mean that the whole image would be affected by the clarity filter.
Try to take a closer look at what has been masked out. You will see that the mask might need a bit of extra work to become more precise. When working with complex images, like hair and fur, you will get a much better result if you take the time to refine the mask properly. You can come back to refining the mask at any step in your editing process.
To refine the mask, right-click on the masking layer and select Refine Edge...

Refine mask in Affinity Photo
This will make the Refine Edge dialog appear.

Refine Edge dialog
In the Refine Edge dialog change the Preview mode to overlay, by clicking on the downward-pointing arrow next to the dropdown where it says Overlay. This allows you to change how you view both the selection and the mask.
You can view it as:
overlay
black and white
a black matte (background)
a white matte (background)
a transparent matte (background)
You might want to change the preview mode to get a better contrast between the object you are trying to mask and the background. This enables you to create a better and more precise mask if you can see what you are doing.
[images-comparison image_1="https://www.photography-raw.com/wp-content/uploads/2017/10/Refine_Selection_overlay.jpg" image_2="https://www.photography-raw.com/wp-content/uploads/2017/10/Refine_Selection_black_white_matte.jpg"]
[images-comparison image_1="https://www.photography-raw.com/wp-content/uploads/2017/10/Refine_Selection_white_matte.jpg" image_2="https://www.photography-raw.com/wp-content/uploads/2017/10/Refine_Selection_black_matte.jpg"]
If you are not working on a photo with a super crisp edge like hair and fur, you might want to increase the feather slider to soften the selection edges. Feathering makes the transition softer. However when you work with crisp edges just keep it at 0px. If you increase the Smooth slider, the edge becomes softer and more smooth instead of jagged and zig-zagged.
Besides using the sliders to refine the edge, you can also paint over trouble areas. This will make Affinity Photo have a look at the area again and refine the selection. Just paint around the edge of the leaf where you want to refine the mask. Affinity Photo does a pretty good job at refining the edge selection. If you find that Affinity Photo selected too much, i.e. that the selection goes beyond an edge, just hold down the Alt (Win) / Option (Mac) key while painting over the trouble area. Work your way around the whole subject until you are happy with the result.
Change the tolerance of the selection by pulling the Border width slider a bit to the right. Experiment with this as it can give you a more precise selection.
The Ramp slider controls the offset of the selection. Pulling it to the left will contract the selection while pushing it to the right will expand your selection.
When you are happy with the mask, go to the Output section of the dialog and make sure that Output To is set to Mask. Next, click Apply to close the Refine Edge dialog.
Advanced Masking in Affinity Photo
If you want to take your Affinity Photo layer masks a bit further, you can create a simple luminosity mask. This is useful when you only want to work with the highlights in your image. By pressing on CMD+ALT while clicking on the layer thumbnail, you will create a simple layer mask based on bright luminosity values. Here at Photography-RAW, we have an advanced video course that will show you how to create real Photoshop-like luminosity masks, and use them for blending multiple images together.
Concluding words
When you learn to use masks in Affinity Photo you will find that it opens up a new world of possibilities. You can use it for combining photos and adjustment layers in a very precise way. Layer masks give you much more control of the photo editing process.
Take your skills in Affinity Photo a step further: Learn a professional and proven workflow, with the Affinity Photo Workflow Video Course.
What is your experience with using masks in Affinity Photo? Share your thoughts in the comments below.