
Top 17 Tips for Macro Photography
Are you hesitant to dive into macro photography because it seems too difficult to get started? Or have you already made your first attempts at close-up or macro photography only to find the resulting photo looking blurry, poorly lit, or otherwise dissatisfactory?
Don't worry we got you covered with this massive post with the best macro photography tips.
Download my Beginners Guide to Macro Photography - for Free!
This type of result is common, especially if this is your first attempt at the macro style. My hope is by the time you finish reading this article, you will be able to get much better results when you capture tiny worlds or small subjects.
My Best Macro Photography Tips
#1: Choose the Best Lens for Macro Photography
The first of our macro photography tips is about using the right gear for the job. The foremost challenge photographers face with this style of photography is being able to get close to the subject. For this very reason, I recommend obtaining specialized equipment for macro photography. Some of this equipment could include any of the following lenses:
Macro Specific Lenses
A macro lens looks similar to a standard lens but internally is vastly different. The glass optics inside are formed in one group. This grouping allows the photographer to get physically closer to a subject. What I find this type of lens offers compared to the standard ‘kit’ lens (typically an 18-55mm lens) is the minimum focus distance.

Macro photography - Nikon 105 mm f/2.8 macro lens
105 mm f/2.8 dedicated macro lens from Nikon (Note: the Nikon term for Macro lens is Micro (a bit confusing))
A macro lens can focus at short distances. This short focus distance provides an opportunity for the photographer to get extremely close to the subject, without the lens losing focus. Essential for close up photography.
Another feature which separates macro lenses from the rest is their wide apertures (typically at an aperture rating of F2.4 or F2.8). The hole in the lens (referred to as an aperture) allows the maximum amount of light to pass through the lens. This is great because in a situation where there is plenty of light a faster shutter speed is achievable, resulting in blur-free images.
Macro Lenses with Stabilizers
On the other hand, if you find yourself in a darker environment, sometimes the wider aperture isn’t going to let in enough light to maintain a fast enough shutter speed. Using a macro lens with a stabilizer will enable you to use a stop or two slower shutter speed and still get sharp images if you need that little bit of extra light. However, it is often not enough, as we will soon discuss. But first, let us finish the talk about lenses with stabilizers.

One of the main differences that determine the price between similar focal length macro lenses is whether or not they have an Optical Stabilizer. The way you can tell if your lens has a stabilizer is to look for a particular acronym on the front or side of the lens. For example Nikon show ‘VR’ (Vibration Reduction), Canon display ‘IS’ (Image Stabilized), Fuji and Sigma engrave ‘OIS’ (Optical Image Stabilized), and Sony decide on OSS (Optical Steady Shot). Olympus and Panasonic, on the other hand, have a stabilized sensor, so they don’t need to make a specifically designed stabilized lens.
So, what is the advantage of a stabilizer for macro photography? The lens will reduce vibrations by using floating elements of glass within its construction. This is one of the reasons why macro lenses with stabilizers can be more expensive. The benefit of a stabilizer is you can hand-hold your shot in low-light situations. However, having a stabilizer isn’t necessary for all setups. For instance, if you are using a tripod or your camera has a built-in stabilizer then a stabilized lens may not be required.
Alternatively, Buy a Used Macro Lens or Use Extension Tubes
If you find the price too expensive, then there are other options. The first one that comes to mind is to research and purchase a pre-owned macro lens. Despite having been used before, they will in most cases, produce photos that are just as sharp.
If you are planning to buy your lens secondhand, ensure you inspect it properly before purchasing. Look for signs of mold or scratches on the inner glass. If you see any of these issues, forget about buying the lens and move on.

Macro photography - extension tubes for extending your lens.
You can combine extension tubes with your ordinary lenses to be able to get closer to your subject.
Another less expensive alternative you could use for getting close to your subject is extension tubes. These hollowed out tubes are convenient for two reasons. First, by attaching an extension tube between your camera body and your existing lens (say a kit lens), you increase the distance of the rear element of your lens from the camera’s sensor. The advantage of this will be a magnification of the focal length, enabling you to get much closer to your subject.
The second advantage of extension tubes is their lower price in comparison to every macro lens available. As this is the case, they can be a great way to get started in macro photography.
You can get a set of extension tubes from, i.e. Kenkoo, which includes three tubes of 12mm, 20mm, and 36mm that you can use separately or in combination if you need to get extremely close to your subject.
The beauty of extension tubes is that you can start using them on a standard kit lens and explore getting closer to your subject and try out macro photography. Suppose you get hooked on macro photography and want to buy a macro photography lens. In that case, you can still use the extension tubes to get even closer than the 1:1 magnification ratio that normal macro lenses offer.
If you really want to keep a low budget, you also have the option to use any of your existing lenses, by using the reverse lens mounting technique.
#2: Control Your Point of Focus
Now we have covered macro lenses we need to take control of your camera. Understanding how your camera works will lead to better use of your equipment. For macro photography, this could mean the difference between a blurry shot and one that is in focus. One of the main things you should control when taking macro photos is the focus point on your camera.
To control your focus point, you first have to switch your camera off automatic mode. You could choose from many settings including Program Auto (P) or manual modes such as Aperture Priority (AV or A), Shutter Priority (TV or S), or Manual (M). Program Auto is recommended if you are just starting in photography. Once you have selected the shooting mode, you will need to identify where the focus menu is located. All cameras adjust the focus in two ways, through a knob or joystick on the back of the camera. To find out where yours is located, I recommend you consult your instruction manual.

Macro photography - close up of a purple flower and bee.
You should pay extra attention to this macro photography tip about focusing, as one of the most common mistakes in macro photography is actually to focus a few millimeters in front of or behind where the focus should have been.
#3: Get as Close as You Can
Once you have found out how to change the focus point, then proceed to move the focus point over the subject on which you wish to focus. Remember if you are physically too close to your subject your lens may not focus.
I do recommend you get as close as you can though. With the majority of macro photography lenses, the minimum focus distance is approximately 30 cm, measured from the camera sensor, meaning that the subject might be as close as 10 cm from the tip of your lens.
If you find the lens does not focus, all you need to do is move back and forth until you discover the 'spot' where your subject becomes sharp.
If you want to get even closer, you can experiment by using extension tubes. However, be aware that when you get even closer to your subject, the depth-of-field becomes razor-thin. Almost too thin for having a pair of insect eyes in sharp focus unless you use focus stacking.

#4: Choose a Suitable Subject and Research
If you want to capture macro subjects outdoor, it’s worth doing a bit of research of where and how to find suitable subjects to photograph. For instance, if you are looking at capturing images of insects (like dragonflies), you must discover their location, their breeding seasons and what behaviors you should expect to encounter and capture. The more details you can gather, the more exciting your images will be.

Macro shot of a dragonfly in black and white.
Some of these things can be learned online, but you should observe things like behavioral characteristics in the field. By studying the insect, you will learn when to press the shutter button based on the insect's behavior at any given time.
Another thing to consider is the time of day you choose to photograph your subject. If you are looking at photographing insects the best time of day is the early morning just after sunrise. Insects are most dormant at this time of day, so the majority of them will sit still long enough for you to get a great shot. To do your research is one of the most indispensable macro photography tips when shooting living subjects.
#5: Use a Longer Focal Length for Living Subjects
If you find you are struggling to get close to an insect or another living subject, then you will have to reconsider your approach. For example, could you use a longer focal length lens to get closer, while being at a greater distance away from your subject?
An additional lens that contains a longer focal length is something many professional photographers will carry with them. If you wish to buy one of these lenses for yourself, look for a focal length of around 105mm to 150mm. At these focal lengths, you will be able to get close, without being physically close.

#6: Know When To Use a Tripod
One of the essential pieces of equipment for any macro photography enthusiast is a sturdy, versatile tripod as most of your subjects will be at the ground level. Therefore look for tripod legs that can move independently from each other and can get close to the ground. If you are hiking long distances, try using a lightweight carbon fiber construction.
If you are using a flash, I suggest you shoot handheld. Otherwise, for most shooting scenarios I recommend using a tripod; however, it would be impractical to use one if you were trying to follow an insect or something moving quickly (but then again that also requires flash in most cases).
Use a tripod for photographing flora or a subject that doesn’t move.
#7: Control Depth of Field
In macro photography, photos have a shallow depth of field, meaning your subject will be in focus and the background will be blurred. This look helps separate your subject from the background. To achieve this shallow depth of field, you might think that you have to shoot at F/2.8. While this could be a good starting point, you will often find that the depth-of-field is too shallow. The closer you get to your subject the shallower the depth-of-field will be even without altering the aperture.
If you want more of your subject in focus, all you have to do is decrease the aperture to F5.6 or F8 or even lower. Just make sure you have sufficient light at these F-stops. If there isn’t enough light, your shutter speed won’t be fast enough, and you could see blurry pictures.

Macro photography tips - controlling depth of field is crucial - floating feather with water droplets.
#8: Shutter Speed for Macro Photography
When photographing macro images, it is essential to consider your camera’s shutter. A fast shutter speed of at least 1/500 of a second or faster is optimal for obtaining sharp photos. Especially if you are not using a tripod, as when you are this close to your subject even minimal camera shake results in exaggerated blur. Also, a slight movement of your subject results in unsharp images.
I recommend you check what shutter speed you have before you take the shot. If the shutter speed isn’t fast enough all you need to do is increase the ISO to a higher level. Alternatively, if you have the resources, using a flash or additional light source to light your subject will also help increase the shutter speed. This will give your macro photography a really professional end result.

Macro photography tips - Use fast enough shutter speed - close up shot of a purple flower with honey bee.
#9: Be Aware of the Background
This macro photography tip is extremely important. Backgrounds in macro photography can be distracting, but they can also be pleasing. Make sure to remove any objects that don’t belong or stand out. Items like colorful buckets, rubbish or reflective surfaces are distracting so be sure to keep an eye out for them before you take the shot.
In macro photography, you will often find that you are in control of the background. By changing position and shooting the subject from another side, you change the background as well. Colorful backgrounds can be a distraction, but they can also be just the thing to make your image special.
Besides controlling light, and getting your macro photos sharp, then getting a smooth and compelling background can be one of the trickiest things to away with.
#10: Advanced Macro Photography Tips: Know When To Use External Flash
One of the keys to great macro photography is excellent lighting. Using dedicated macro flash units with diffusers will help aim light into selected areas of the frame. Setups include twin light flash units that attach to the front of your lens, LED lights found at the front of some lenses, or ring flashes that utilize distributed light from a central flash unit that attaches to the hot shoe mount of your camera. You don’t need to use a flash all the time, only when there is not enough available light. Learning when and how to use a flash is the macro photography tip, that can take your shots from good to great.
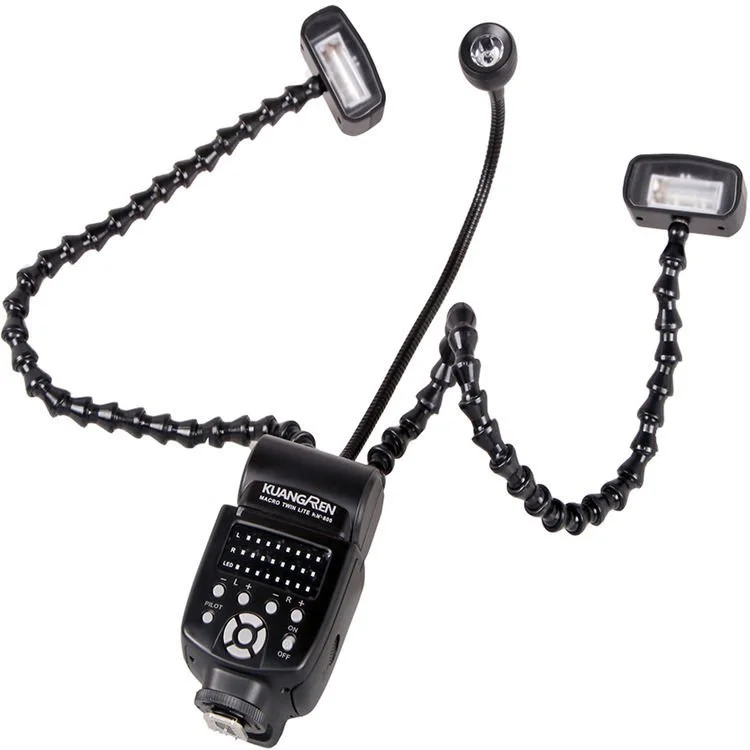
Know when to use a flash - Venus Optics KX-800 Flexible Twin Flash.
#11: Use a Great Composition
A great photograph always possesses excellent composition. Remember the rule of thirds when holding the camera to your eye and try and position your subject on a third line. The rule of thirds is an almost foolproof composition strategy, and great to remember when you first start in macro photography. Later, when you understand the other key points, you can begin to alter the composition and be more creative. However, if you focus on using an artistic composition before you know which settings to use to get a good result, you will often get discouraged because you don't go home with any keepers.
#12: Have Your Camera Parallel With the Subject
I see many photographers take photos of an insect or flower from a standing position. While having a vertical view of your subject is great for aerial shots, it is best to perform macro photography at the same level as your subject. I highly recommend being parallel to your subject. By positioning yourself this way, you will increase the depth of field ensuring you have the majority of your subject in focus.

Have your camera parallel with the subject
#13: Apply the Lead Room Principle
Photographs with a singular subject, such as macro photographs, benefit from the lead room principle a lot. The lead room principle is a composition technique for creating more appealing pictures. It means leaving empty space in front of the subject or in the direction of its gaze. The principle is often used in portraiture, fashion and event photography, wildlife photography, and nature photography. It enhances the visual story by presenting the subject not just with an appearance but also with activity.
The technique aims to create perspective and dynamism within the frame. The space draws the viewer’s attention and makes it curious to find out (or imagine) what the subject sees. As a result, the viewer will spend more time exploring the photograph. The effect is even more intense when you photograph insects or tiny subjects that usually go unnoticed. You give them a voice and let the viewer see the world from their perspective.

#14: Be Patient
Constantly moving insects, a slight breeze of the wind, light changing and several other factors can make macro photography challenging. If I can give you one word of advice, it would be patience.
Practicing patience is a must for macro photography. With so many elements out of your control, it can be a waiting game before you get the shot. You may end up taking hundreds of photos before you get an award winner. It’s what makes close up photography so exciting; sometimes you don’t know what you will get until you are out in the field taking photos. Remember, good things come to those who wait.

Macro shot of a tiny snail on an orange flower.
#15: Pro Macro Photography Tips: Use the Right Focus Method
We previously mentioned changing your focus point, but something else to consider is manual focus. For moving insects, you will find that switching to manual focus and instead shifting your upper body back and forth until the subject is in sharp focus is the way to proceed. Autofocus is merely too slow for macro photography that involves a moving subject.

#16: Try Focus Stacking
As it is very easy to lose focus when you are very close to the subject or use large apertures, many macro photographers use focus stacking to make sure they have more of the subject in focus. Focus stacking means taking multiple photographs of the same scene using the same exposure settings and slightly adjusting the focus between shots.
You end up with a series of similar photographs that have a different part of the subject in focus. Then, with the help of a photo editor, you overlay the photographs and create a final image that cumulates the areas in focus and has a deeper depth of field.
The good news is many DSLRs and mirrorless cameras have a “focus shift” feature that helps you create focus stacking. The camera can take several shots automatically varying the focus by a set amount. You decide how many photographs you want and the focus step width. Make sure you use a tripod when trying focus stacking to preserve the position of the camera throughout the process.

Nikon D850 focus shift settings
#17: Learn to See
Begin to pay attention to the small details wherever you go. For example, instead of looking at the whole tree, look closer at the bark or the individual veins on a leaf. It’s this sort of close up detail you should train your eye to see. Over time you will naturally start to look for compositions and the smaller details in life.
An important lesson when learning to see things as a trained macro photographer does is to slow down. You can't expect to find the interesting details if you keep your normal pace. Take your time and explore.
Concluding words
Now you have the best macro photography tips. The only thing left to do now is to pack your gear, and you will be well on your way to taking amazing macro photos. Expect to have fun and take plenty of pictures because macro photography is all about exploring a new world - a world full of tiny things!