
Best Macro Photography Settings
Macro Photography comes with its own unique set of challenges. When we try to discover the best settings for Macro Photography, we realize that there is no one-size-fits-all here. It depends on the type of macro photography you shoot.
You need to keep your brain functioning and let the camera controls be in your reflexes. You will need it, more so while you chase the bumbling bees for the perfect shot while using a lens that is designed to enhance details but also has its flip sides.
Even though you won't find a camera setting that fits all possible situations, we can point to great starting points from which you can adjust to the specific scene and lighting conditions you face when doing macro photography.
Let us take this subject into three different parts:
Still Life Macro Photography
Macro Photography of Moving Subjects with Flash/External Light
Macro Photography of Moving Subjects Using Ambient Light
Download my Beginners Guide to Macro Photography - for Free!

Bee on Chives Flower
Download my free Beginners Guide to Macro Photography!
Settings for Still Life Macro Photography
Still-life macro photography is an ideal form of macro photography in terms of control of the scene, and light. Some of the best camera settings and shoot preparations for Still Life Macro Photography are:
Always Use a Tripod for Still Life Macro Photography
When shooting still life, you should always use a tripod because it allows you the stability that is required. It will simply give you a much better keepers rate than handheld. Often, for macro, you will be shooting at very low speeds. A tripod with a remote shutter release, (or a timer mode in case the remote shutter isn’t available,) is an ideal scenario.
It also means that you can move the focus without changing neither the camera position, light, or the subject. This is helpful if you want to focus-stack your images.

Always Use Manual Focus for Still Life Macro Photography
Another setting that is more of a rule in macro photography is to use manual focus. In macro lenses, there’s a very shallow depth of field, and the focusing is not really straightforward. If you use autofocus you might place the point of focus a little in front of or behind the most important point of interest in your subject, and the image will look blurred where you don't expect it to be. It is best to use manual focus. It is helpful even in case of taking images at different focal points so as to cover the entire image in focus and later use stacking to combine different points of focus.

Use Manual Mode
For still life, it is best to control both the aperture and shutter speed. Since it is on a tripod, you can take the shutter speed as slow as you want. Therefore, you would want a closed-down aperture to get the whole subject in focus, while still keeping the ISO low, to avoid unnecessary noise.
Using a shutter speed between 1/60-1/125 is a good starting point for still-life photography, but it of course depends on the lighting of the scene, if you should go even slower.
Manual mode is especially useful because you may be shooting still life in artificial light. If you use a flash to bounce of the ceiling to light your still life macro photography scene, simply use the flash sync speed (usually 1/125-1/250)

Manual Mode is the Best Mode for Macro Photography
Use Live View Mode With Tethered Shooting if Possible
Live view mode is the preferred mode of shooting macro if your subject isn't moving. This is because, in live view mode, the mirror lock is up. This helps in reducing the minor shake that happens when the mirror lock goes up. It also helps in nailing the focus because you can zoom in on your subject much closer and set the focus manually through the live-view display, so you make sure that the focus is perfect.
Focusing through live-view generally gives you much sharper results. However, remember, that this only works if you use a tripod, and your subject isn't moving.
Also, try to shoot tethered if possible, if you are in a studio or can connect your laptop to your camera. This allows for instant viewing of the results, so you can see the result on your computer screen immediately. This allows you to make adjustments to exposure and external light sources immediately.
If you use a program like Capture One, you can also apply a style directly during tethered capture, bringing you very close to the final edited result as you capture the shots.

Best camera settings for still life macro photography

Macro Photography of Moving Subjects
Macro Photography of a moving subject is one of the most difficult tasks you are ever going to face in photography. In case you have the luxury of a flash or external light, you may be able to manage better than without it.
Let’s look at the situation at hand. You may be shooting a bee or an insect in a garden. You probably can’t move it. However, it can move or fly away, and you can’t predict its movement at the best of times.
It takes more than photography skills alone to create a great photo of this kind. Some of the below macro photography settings are good starting points if you don't want to use artificial light. We cover using artificial light further down below.

Best macro photography settings for moving subjects
The bumble bee is captured using a shutter speed of 1/2000 using natural light
Macro Photography Settings for Moving Subjects using Ambient Light
Shooting macro with natural light means there’s enough light available that is well diffused. It means you aren’t likely to shoot during the noon and a couple of hours before and after that at least. The next point is the ability of the camera to be good at higher ISOs. A crop-frame camera is difficult unless you don’t have an option. Trying to find the right balance will then involve you knowing the sweet-spot of the lens, your camera's ability to handle ISO, and bright but diffused light.
Use a High Aperture Value
High aperture value, or a closed-down aperture, is your best chance to get at least a significant part of the subject in focus, especially taking into account that it is moving. You should ideally look for something beyond f/11 or f/13, and in some cases, you may have to go to f/16 or f/18. However, be wary of the diffraction. At higher F-numbers, diffraction is considerably more. My personal favorite starting point with my Nikon D810 and a Tamron 90mm lens is f/14. However, it depends on a lot of factors like working distance, focal length, crop vs. full-frame sensor, and so on. You need to know your camera, your lens, and its sweet spot. Full-frame cameras perform better at higher aperture values than crop-frame cameras because the diffraction seeps in considerably later.
Keep Shutter Fast, if you have Sufficient Light
Keeping shutter fast enough means that you are able to gauge the speed of the subject, and can freeze the subject in its movement. The speed, however, should not be too fast, because you already need to work on a high F-number, and light will be scarce. Therefore, it is best to be at the minimum possible shutter speed where the subject will not have motion blur. However, you will probably have to go higher than you might think.
The shutter speed is differs depending on your moving subjects. A slow-moving ant, for example, can be shot easily at 1/100 or even slightly lower (especially if you have the right practice shooting sharp pictures at slower shutter speeds and can hold your camera completely still. However to freeze a dragonfly or bee in flight you have to go above 1/1000 or even faster if you don't use a flash. With a high aperture value of f/11-f/18, this is often not possible, because you will find that you lack sufficient light.
A good starting point setting for shutter speed is around 1/400 for handheld macro photography of moving subjects.
Use Auto-ISO
For shooting a moving subject without a flash, I recommend that you set your camera on Auto-ISO, to have one less thing to think about.

Macro Photography Settings Moving Subjects with Flash/External Light
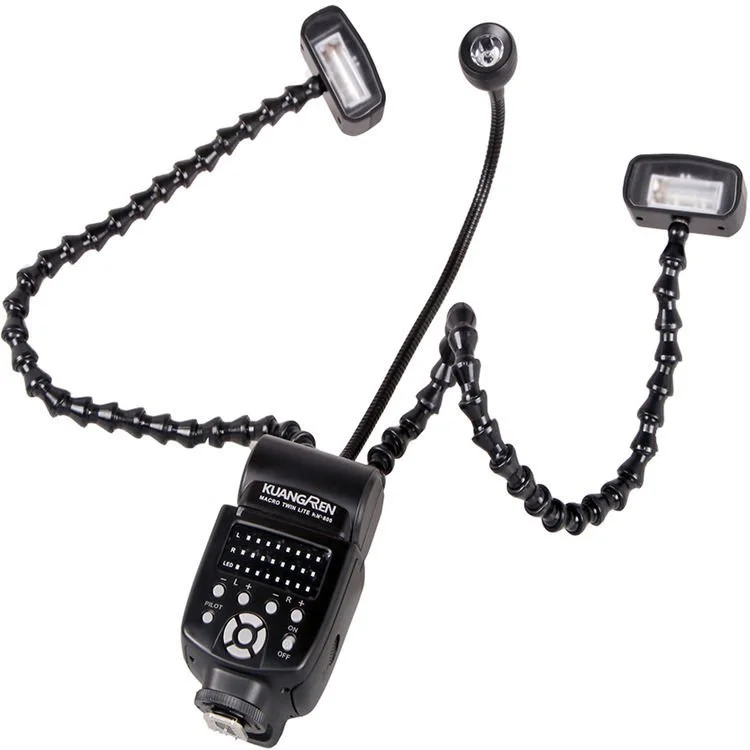
Shooting macro takes us very close to the subject at times. There are several types of light that can help us illuminate the scene for macro photography. Besides using an external speed light with a diffuser, you can invest in a ring flash or dual flash system made specifically for macro photography.
A ring flash is one that we put across the lens of the camera. Thus, it always lights perfectly even in close subjects. Also, it provides even light from all ends. However, the result can also look a bit flat.
If you use other flashes, you’ll have to use a paper or a diffuser to have the light immerse the subject, while also keeping the light in a diffused state. There’s no worse image of an insect than badly lit or partially lit. The highlights and specular can kill an image quite easily. You will likely find that you get the best light from a dual/twin flash system with diffusers.
Often you will find that you get the best results if you set the flash to shoot at around 1/8th of full power, enabling you to light the scene, while also having the possibility to fire off a short burst of shots.
Macro Settings for Moving Subjects - Common for Both Natural and Artificial Light
Shoot through the Viewfinder for Macro Photography of Insects and Other Moving Subjects
While a still subject is best shot with live-view, there are reasons for shooting using the viewfinder when we deal with moving subjects. It is because the subject is constantly on the fly, quite literally. You can’t possibly shoot them through the live-view because focusing will be impossible. Live-view is simply too slow for catching moving insects. With the viewfinder, you are seeing what the camera is seeing, without the slight delay you experience when using live-view.

Follow Focus, Keep Away from the Focus Ring
It might sound weird, but the best way to focus while shooting macro is to slightly move your body in different directions to obtain focus.
Once you have built your comfortable shooting position, you should simply use the focus ring on manual mode to put the focus area correctly. It should be somewhere near where you intend to focus. Thereafter, you have to use your body and move it slightly back and forth to focus. You can mimic the movement of the insect, or even pre-empt and plan the shot easily when you are depending on your body movement.
The focus ring can be slow, difficult to operate, and non-intuitive while shooting the moving subjects.
A note of warning though. It takes both patience and practice to get this technique working for you. You will likely not master it in your first macro session using this technique.

Invest in a Sturdy Monopod
Monopods are better than tripods for capturing macro photos of moving subjects because they add the needed stability without being too rigid to set up, allowing the bug to escape before we are ready to take a shot.
The chances of shaking can be reduced and the focusing would be easier, as will be following.
In my experience, my failed attempts to get a great macro shot are often due to misplacing the point of focus by just a few millimeters (i.e. not on the eyes of the bug). So even though an external flash helps freeze the subject motion, and also a bit of camera shake from handholding the camera, you can still easily miss having the focus point where you want it, if your body moves just slightly between nailing the focus and pressing the shutter.
Therefore a monopod can help you gain a little more stability, even though not all macro subjects sit in places where you can position a monopod.
Burst Mode is Your Friend
While shooting moving subjects, especially those that can move fast, trying to stabilize and then shooting in burst mode while mimicking the movement of the subject can be beneficial. The first shot is the most likely to be perfect, but the burst mode gives a safety cushion for nailing the shot.
You will likely have more images you throw away than keepers, therefore burst mode is one of the most essential macro photography settings. And remember don't be cheap with your shoots. Extra shots don't cost you anything and you can delete the missed shots.
Burst Mode and Focus Stacking
To be truthful, very few photographers are able to maintain focus even in the eyes. It takes immense practice. To try and do a complete subject in focus using focus stacking appears impossible. However, it is possible and has been done. The requirement is to be at the highest level of patience, training, and reflexes. A burst mode is the only tool that can help. A macro rail helps you move back and forth easily. But it requires you to move, lock, shoot, and move again. An insect won’t give you time. Also, there’s a difficulty in setup. Relying on your own body is far easier, wherein you can simply glide the body. As mentioned above a monopod, is also a possibility for extra stability with only a few restrictions.
Start from the part most in front, and keep taking picture as you glide to cover the full subject in focus. One way to avoid getting stuck or adding shake or extra movements is to shoot in burst mode. You can simply fix your finger on the shutter and move from front to rear of the subject. It requires a long time to know about the particular habits and movements of the subject, and be comfortable in the surroundings. Therefore, the ideal way is to shoot the subject enough times with eyes in focus so that you cannot be disappointed and take on the next challenge.
Shoot Manual
Whether you are shooting with external lights or not, you need to simply fix the settings on manual. You know aperture needs to be closed-down enough to give you enough depth-of-field, and shutter speed needs to be fast enough. You can't let the camera decide these settings for you.
You can adjust the ISO accordingly, take a test shot, and let it fly. With external light, you can keep the ISO really low, and it also allows you to push aperture further than what is possible in the natural light. With only natural light, it is best to fix the ISO at auto (with an upper limit) and let the camera take care of the correct exposure.
Get the Eyes in Focus
It is often impossible to get the entire subject in focus. Therefore, focus on the eyes. Tack sharp eyes can make the subject look great, even if part of the subject is properly blurred out. It is because of the way human eyes are trailed to see living organisms. If the eyes are not in focus, one can most likely never engage the viewer in the picture, despite using the best macro photography settings. Therefore, look for the eyes to focus.

Fast moving insects requires its own particular macro photography settings.
Know Your Subject
Macro photography isn’t easy in itself, but your worst nightmare can be moving subject macro photography. Some of the insects move insanely fast, are sensitive to humans, and absolutely hate getting photographed.
You need to learn about them and approach them in a way that disturbs them as little as possible. Both because you don't want to harm them but also because you can get closer to them if you know how to behave and approach them. You also have a responsibility, as a photographer as well as a citizen, to conserve their habitat, not harm it, or the insects you are shooting.

To achieve this, it is ideal to learn more about the subject you are shooting. A simple web search will lead you with plenty of tips.
For example, the insect family, in general, is better photographed in the morning. They are slower in the morning and gain their energy as soon as the day starts progressing. This is why the best macro pictures will be captured during the morning.
More such details will be available to you upon research, which will help greatly in taking the best possible macro photos. Therefore, research will help you get a better keepers rate with the setup suggested.
Concluding words
Macro photography is an art. It tests all parts equally - the focus, the reflexes, the fitness, photographic mastery, knowledge of camera and lens, and a strong resolve. There’s no way you can achieve anything in macro photography without any of these. However, in this article, I have given you a starting point for the optimal macro photography settings to use. Shooting insects is even more difficult than still life. The best way to approach it is to simply fall in love, and work passionately. Macro photography also tends to be very rewarding for those who care enough.